


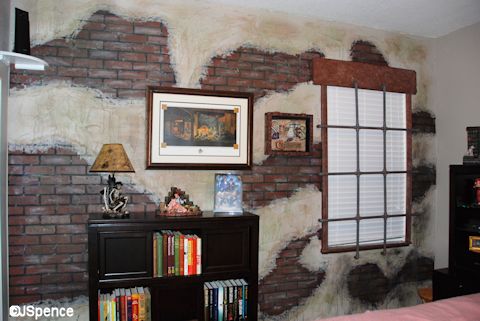
Yesterday I showed you my Pirates of the Caribbean guest bedroom “feature” wall.
If you would like to recreate a similar wall in your own home, here are the steps I took.
I began buy buying “brick” paneling at Lowes. Each 4’x8′ panel cost $25 and features bricks that are slightly raised from the grout. In other words, the paneling is slightly 3D.
As I knew that someday I would need to remove my feature wall in order to sell the house to a non-Disney fan, I used minimal nails and glue to attach each panel to the wall.
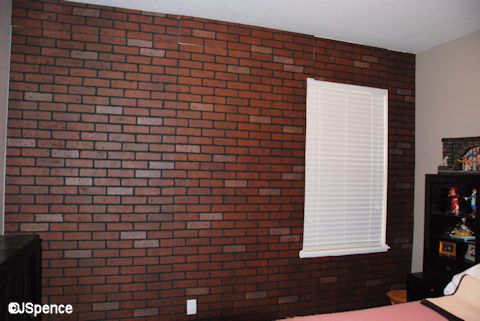
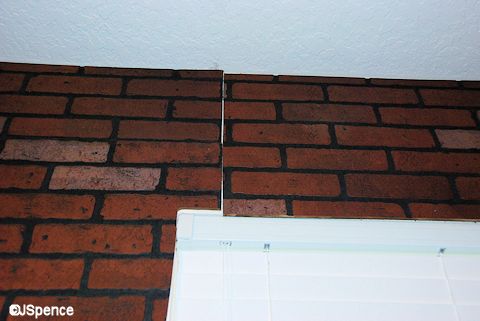
Since my ceilings are 9’4″ high and the paneling is only 8′ high, this necessitated some cutting and fitting. Although I attempted to line the bricks up carefully and minimize seams, the nature of the project allowed me to be sloppy in places. More on this later.
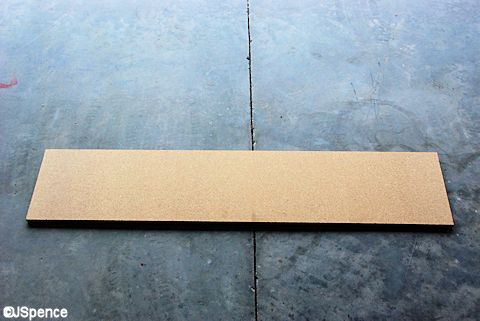
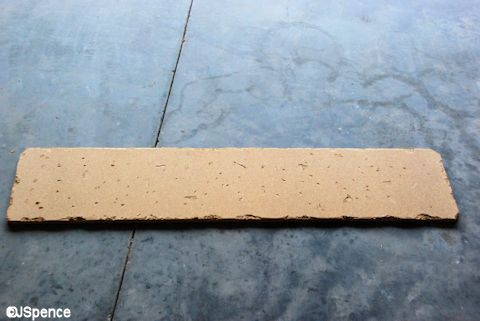
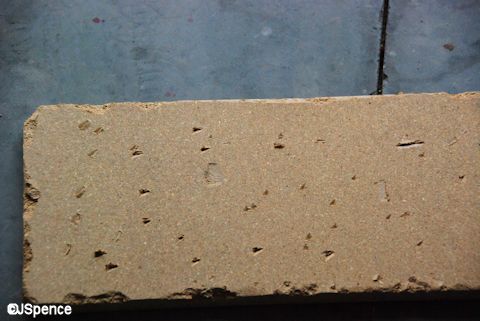
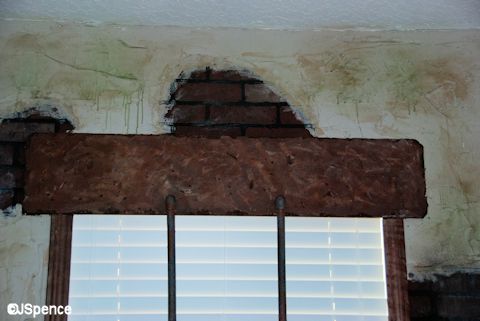
Architecturally, my window needed some sort of a faux header to appear as if it supports the weight of the bricks above. For this I took a simple piece of particle board. Then, using a claw hammer, wood chisels, and a plane, I nicked and gouged the wood to make it look like it had been created using primitive tools and exposed to the elements for years. I then nailed this header over the window and attached two pieces of molding along the sides of the window that run from the header to the sill.
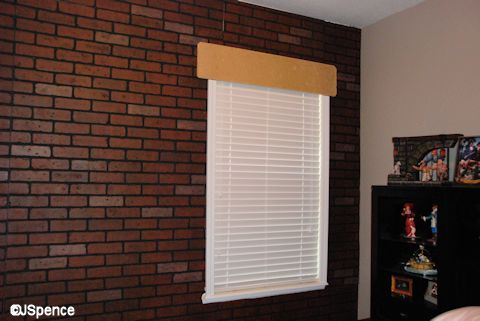
Once in place, I painted the header, molding, and sill a dark brown, careful not to get any paint on the bricks.
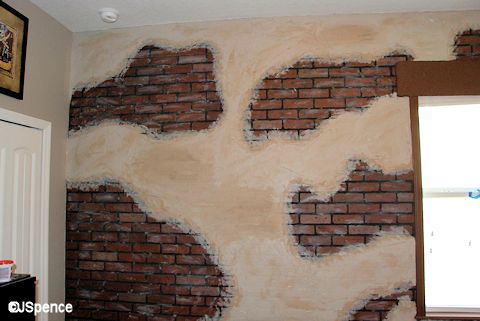
Now it was time to decide just how much of the wall would be exposed bricks and how much aging plaster. There is no formula for this; it’s simply a matter of taste. I opted for a fair amount of brick to be displayed.
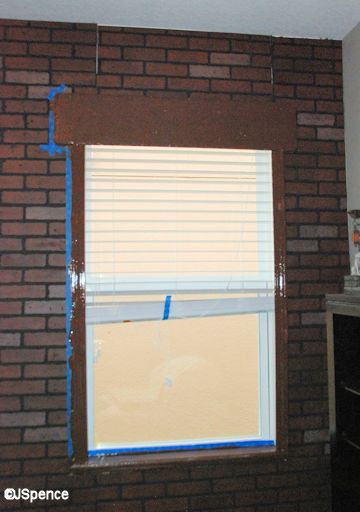
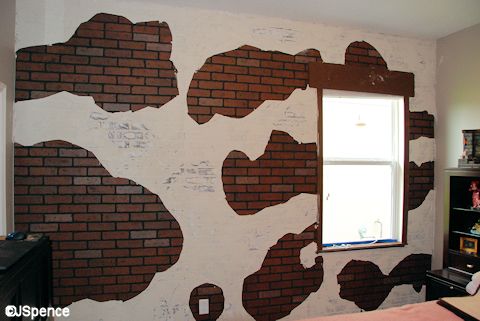
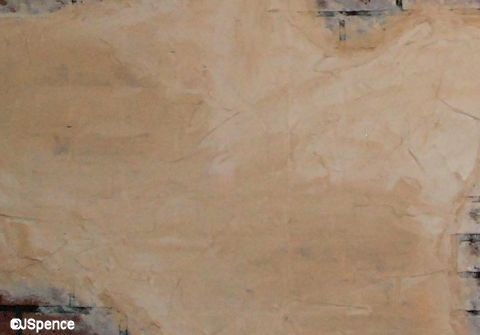
The next step was to protect the brick that I wanted exposed once the project was finished. To do this, I used aluminum foil and painters’ tape to cover areas of the wall. But cardboard and masking tape would work just as well.
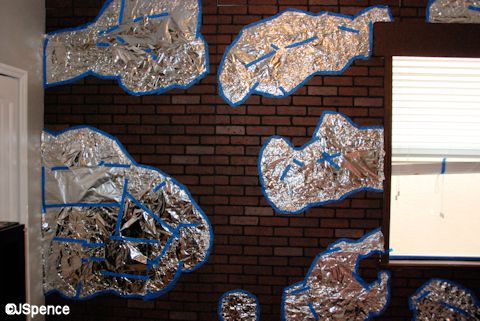
Remember, in the above picture, all of the exposed brick you see will eventually be covered with plaster. The brick under the foil will be what we see as the finished product.
This is also the time to think about the seams found between the panels. Be careful to leave them exposed at this point so they will be covered by plaster – and hidden.
For the plaster I used all-purpose sheetrock joint compound. A bucket costs about $14 and contains ample product for this project. Joint compound can be purchased at Lowes or Home Depot.
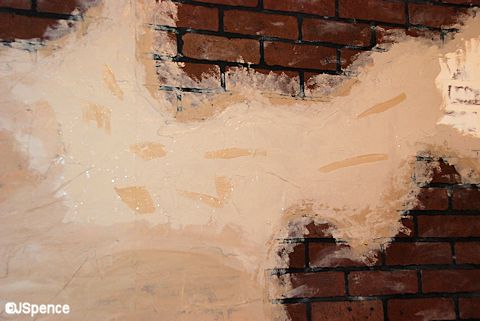
I used a trowel to apply the plaster to the brick. In some areas I applied it thickly, in other areas, so thin as to see the bricks beneath. In addition, don’t try to make a perfectly smooth wall. Remember, the wall you’re trying to recreate was made by primitive tools by today’s standards.
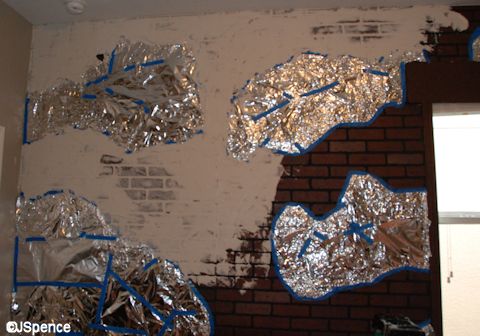
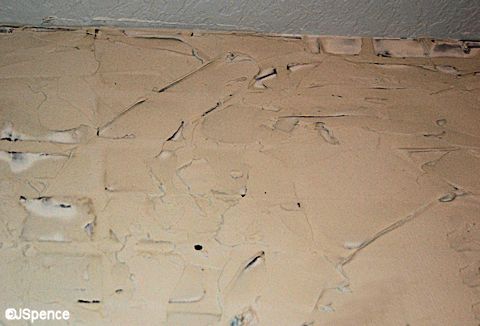
While the plaster is still wet, remove the foil and tape.
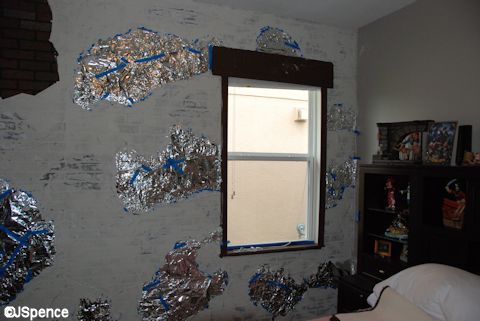
I have to admit, when I got to this stage of the project, I thought, “This looks horrible. What have I done? How much work is it going to be to undo this mess?” But I continued on.
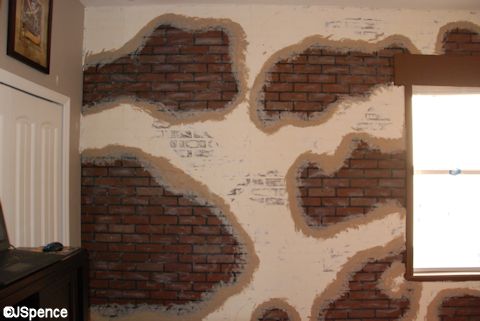
After removing the foil, the edges of the plaster need to be attended to. The high spots should be smoothed out and the straight lines softened into curves. No special tools are needed for this task. I just used my fingers to even things out. With this portion of the project complete, I stopped work for the day as the plaster needed to dry overnight before painting.
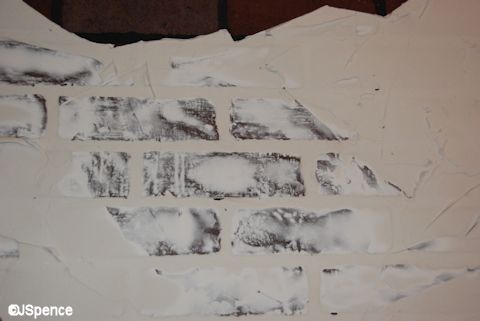
Because I wanted the feature wall to blend with the rest of the room, I used the same grayish-green paint that I used on the other walls as the base color for the plaster. However, before I could begin painting in earnest, I needed to “soften” the edges where the plaster meets the bricks. For this I used a sponge. I would lightly dip the sponge into the paint, then gently tap the color onto the plaster and brick.
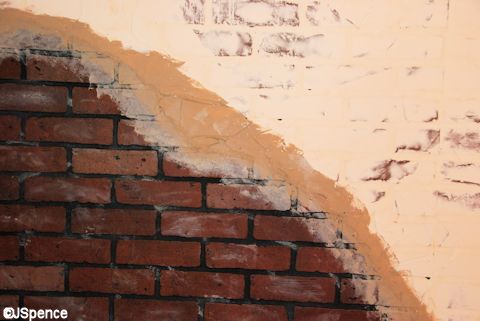
Also during this “sponging” phase, I would apply dabs of paint to several of the bricks. Then, using my fingers, I would smear it in. Remember, the bricks need to look as old as the plaster.

After the edges were complete, I started applying a thick coat of the base gray/green paint. I worked in small areas of about 2 foot square. While the paint was still very wet, I applied stripes of a light brown color using a sponge.
Then, using the same sponge, I blended the brown paint into the gray using a random pattern.
This next step is extremely important.
At a craft store (Michael’s) I purchased four small bottles of acrylic poster paint, black, dark brown, olive green, and deep orange. I also bought a plastic spray bottle.
Starting with the black color, I mixed 1 part paint with about 30 or 40 parts water in the spray bottle. My goal was to create a very watery solution – or in other words, a very weak stain. Once mixed, I liberally sprayed the entire wall (both brick and plaster) with this solution. Sometimes I would let the mixture run down the wall, finding the various nooks and crannies of the surface. Other times I would dab the wet wall with a cloth to create a more blotchy look. I repeated these steps with both the brown and olive green. I saved the orange paint for later.

Even though the black, brown, and green will only be slightly noticeable on the dark bricks, it’s still important to spray them as it will soak into the paint you dabbed onto the bricks earlier.
Next I created a watery solution using my original gray-green wall color. I used this color to liberally spray the bricks. Its lighter hue contrasted with the dark bricks and “aged” them.
Note, in order to demonstrate my effects, I have exaggerated the coloring while photoshopping the pictures.
Now it’s time to age the window header, boarder, and sill. For this I used the black, brown, and olive green paints at full strength and dabbed them onto the wood, smearing and blending as appropriate.
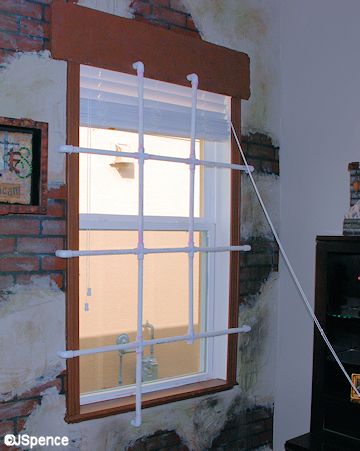
Since my feature wall had a window, I needed to come up with some logical explanation for its existence. So I decided to make this the opening of a jail cell. To convey that story, I would add bars. Of course, real metal bars would be heavy and difficult to work with, so I opted to use ½ inch PVC pipe. First I made the basic frame.
Then, to soften the edges of where the pipes meet the joints, I applied spackle. I also applied spackle to non-joint areas of the pipe just to add “blemishes” to the “metal.”
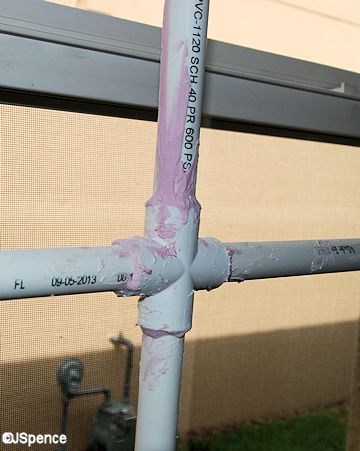
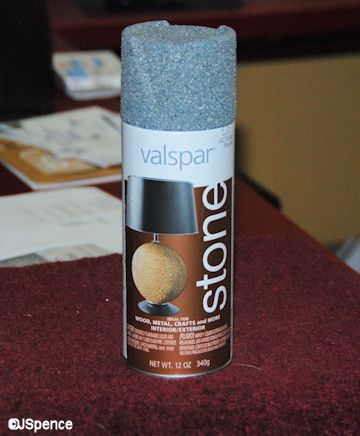
To recreate a decaying metal look, I bought Valspar “stone” spray paint. This paint creates a very rough surface and is perfect for replicating decaying iron. Note, this paint does not go very far and two were necessary. And remember, you must paint both sides of the pipe. In addition, this paint dries slowly so have patience.
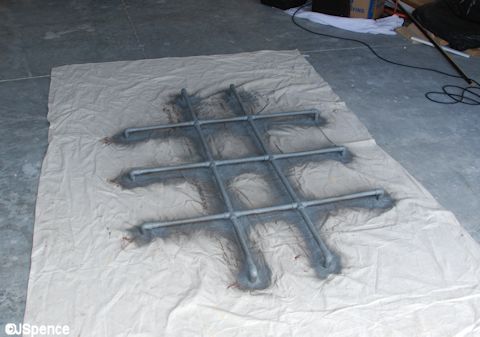
Once the stone paint had dried, I created a water mixture using the dark orange paint I had purchased. I then sprayed the piping with this color to simulate light rust and give the pipe a varied color. I also used the orange paint full strength at every joint to replicate extensive rust. And where the piping “attached” to the wall, I applied orange paint to make it appear that rust was dripping down the plaster and brick.
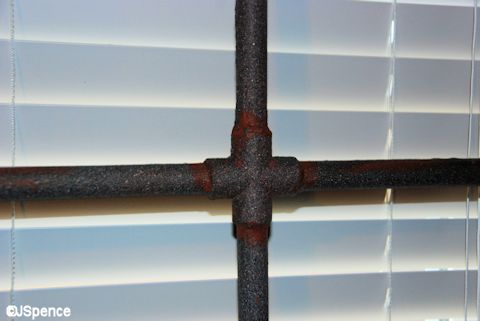
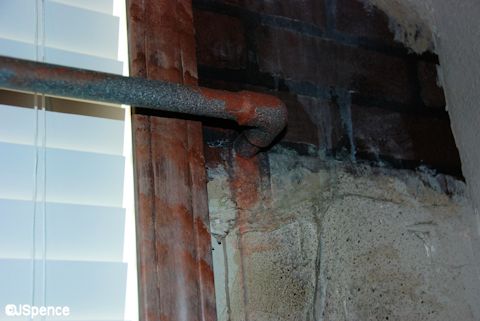
Note, I used a flash when taking the above pictures so you could see how I created the effect – thus, it looks very unrealistic. But in a room illuminated with incandescent lighting, the effect looks quite real.
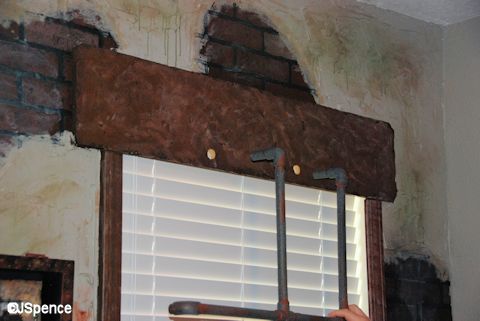
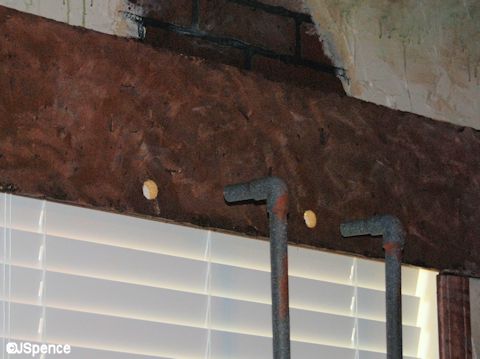
Now I know what you’re thinking. Bars covering a window, even plastic bars, is not a good idea. What if an emergency arises and someone needs to exit the room via this window. Well, I thought of that.
To attach the bars to the wall, I drilled two ½ inch holes in the window header. The entire plastic bar assembly hangs from these holes. A child can easily remove this lightweight structure. In addition, all guests staying in this room are given instructions on how to remove the bars.
So there you have it. How to create a feature wall in just three days. All told, this wall cost me less than $200.
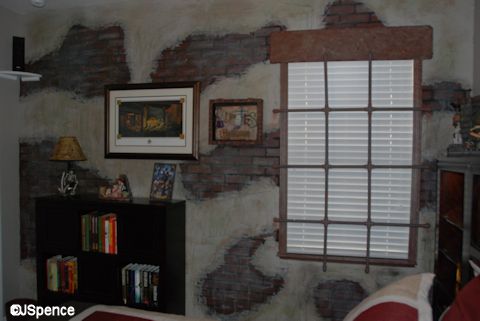
If I had it to do over again, I would replace the white window blinds with some sort of bamboo curtain to cut down on the sharp contrast. I do plan on doing this sometime in the future, but it will require removing the header and side molding – something I’m not looking forward to as seamlessly reinstalling them will be challenging.


Hey there – great work. We are POTC fans here as well. I have never done a whole room, but I did make an awesome lamp. If you are interested in it or if someone you know would like it (I can make more I think…), please check out my etsy shop: http://www.etsy.com/listing/180522986/pirate-lamp?ref=sr_gallery_6&ga_search_query=pirate+lamp&ga_view_type=gallery&ga_ship_to=US&ga_ref=auto2&ga_explicit_scope=1&ga_search_type=handmade Your guest room (and especially that wall – AMAZING) will be an inspiration for me when we finish our basement. My kids will love it!!
Welcome back, you were missed!!!
I love your room. It is awesome.
Hi Jack (Sparrow),
Sooo glad to have you back, I missed your articles. Read all the archives and enjoyed them.
Your room is fantastic! Your creativity and effort you put in your home and your blog is to be admired.
Welcome back.
whew !!! no wonder you wanted so much time away from your adoring fans !! well done . how much for the tour ???
My first thought when I saw a new post was, “He’s back! He’s back!”, so welcome back, Jack! LOL.
I must say, I really enjoyed these posts about your pirate room and look forward to more about your interior decorating.
It’s so glad to have you back! Love the room- you could totally have your own show on HGTV!
Welcome back! I used much of the same technique a few years ago, using fake stone 4×8 paneling to build a “castle” bunk bed for the kids. Didn’t think of the acrylic paint spray, though. Good tips.
Glad you’re back! Just got back from Disney, the week and a half “before” the week of Christmas and it was wonderful. When I saw your video of Christmas week, I thanked my lucky stars for our week. Great job on the guest bedroom, what a great imagineer you are!!
Welcome back Jack! I’ve missed your writings!!
I also really admire the amount of effort and creativity you put in to your guest room. Nice!
Umm.. can I be your friend? 😉
Wow, extremely talented wall. Thanks for sharing.
It is obvious the Disney theme-ing that makes the parks so wonderful has worn off on you and your techniques are great and extremely affordable. Nice job! I alwasy joke with my family that I would love my house to be like the queue for POTC.
A-MAZ-ING Jack!!!!!! I’m jealous!
So happy to see you back in the saddle! The room looks fantastic and it was nice of you to give us all a DIY lesson…maybe you could do a demonstration at the next Flower and Garden show! HGTV look out!
Will be looking forward to a fresh set of Jack stories. You made this freezing day a bit warmer! Thanks
Wow!
Jack that is amazing and you make it sound so easy, but I’m sure it wasn’t. I am also sure I wouldn’t have the patience for it, but I love seeing others do these things. Well done, and I am sure that your guests will really enjoy the room, maybe too much that they won’t want to leave. 🙂
Very impressive, Jack!!! Disney might want to borrow you as a consultant!!!
Ok. I absolutely loved it. You returned with an awesome start to the year. It is amazing how much so many of us look forward to your postings, with all of them meant just for each one of us. You are able to speak to all of us one at a time it seems.
Of course, now my wife isn’t AS happy as I was about it… as I showed her the magnificent wall you created, and I got as far as, “Honey, how’d you like to…” and right then the look said…I should be quiet and not do any more thinking.
People have asked about renting your room…I would rather hire you to work your magic on a wall at our house, that is, once I convince she-who-must-be-obeyed.
thanx for the instructions, and welcome back!
I’m so impressed with your decorating skills. You should commercialise your talent.
Thanks for sharing!
Hey Jack,
That was a very neat way to give a room a lot of style. Great job on the instructions.
Have you started the Disney topiaries in the yard yet!!
Dave.
Ahoy Matey,
SOOOOO Glad you are back. As you may have noticed you have been sorely missed. Now I know why you needed such a long time off to do this room. WHERE did you get all these ideas. You are very creative – or does this creativity seep into you when working at Disney?? IT looks great. Please think of all of us fans when you hear the train whistle and watch the fireworks as we are with you in spirit (and envy of course – lol). Can’t wait to read your upcoming blogs.
One of your many friends and fans.
Bonnie
Jack’s Answer:
As for my ideas for the Pirate room… I think working at Disney did help. I often look at the various effects I see in the parks and wonder how the Imagineers pulled it off.
Great job, Jack!!
I agree with Scott’s comment above – paint the blinds. But maybe instead of the wallcolor, you could make it look bamboo-ish or maybe like a dried grass curtain. It think once you paint the blinds, they will look less like blinds and work as a trump l’oeil. Either way, your room looks fabulous and you should be very proud of the work you put into it.
Welcome back Jack. (hehe it ryhmes)
So good to see you had a great time away, and that your move was successful.
That wall is amazing, I feel the need to buy my own house so I can do something like that as well.
Welcome back Jack! Glad your move is done and you are settled. Looking forward to what you have in store for us this year. My wife told me to ask you what your room rates are, and do you include dining plan. 🙂 I’ll even assist you on one of your Disney construction blogs.
Jack’s Comment:
As for my room rates… Let’s see. What’s that old saying? If you have to ask, you can’t afford it. LOL Just kidding.
Hey Jack
Great job on the wall. It is absolutly awesome. The hard work that you put into paid off. I hope we have a chance to see the rest of the new house soon. Can’t wait for your next blog and as always keep up the great work.
Wow amazing job. Love the doors. I am glad you are back
Wow Jack, the room looks amazing!
Welcome back:)
Very, very crafty. This also brings out the concept of seeing the project through. I’ve started projects and had that “what have I done” moment, but following though I’ve been very happy with the results.
Your Pirates of the Caribbean room is absolutely fabulous, and you should be very, very proud!
Thanks so much for sharing the process.
Hi Jack,
Firstly, welcome back! Mondays just haven’t been the same without your latest blog!
Great room! When you said you were moving I was wondering how you could possibly top your Mickey room, but you certainly did it! Well Done!
Jack, glad you’re back and your new homestead has turned out so well. I’m sure with that Pirate room you could start booking stays there.
If the window blinds are white plastic, maybe you could just paint them to match the wall?
Welcome back!!!! That’s wall looks AWESOME!!!!
Awesome wall and great step by step instructions.
So great to have you back!
Cheers!